Did you know that ring lights, back drops, and million dollar cameras aren’t needed to make Grammy worthy content (LOL)?? Believe it or not… all the equipment you need is right there in the palm of your hand. I’m talking about your iPhone! Your phone is equipped with so many hidden camera functions that can take your video production and quality from ZERO to HERO. Today, I’m going to walk you through how to set up your iPhone camera so you can be on your way to those Grammy nominations 😉
STEP ONE- HOW TO HOLD YOUR PHONE
This is a very important step! B E F O R E you even press record, we’ve got to make sure that you’re set up for success. Being thoughtful of where you are planning to post or share your videos is major. If you’re uploading to YouTube, then a horizontal orientation works best. If you’re posting to Instagram, vertical videos look better. If you’re going to be editing a few video clips together, make sure you’re holding the phone the same way for EVERY CLIP. This will make editing them far easier and spare you any black bars or weird spacing/zoom issues.
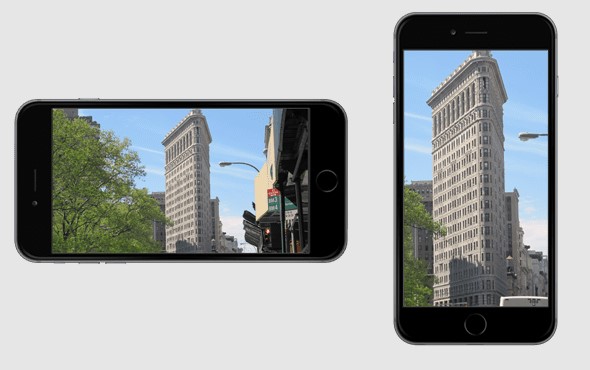
(For example: YouTube on the left, Instagram on the right)
STEP TWO- LET THERE BE LIGHT
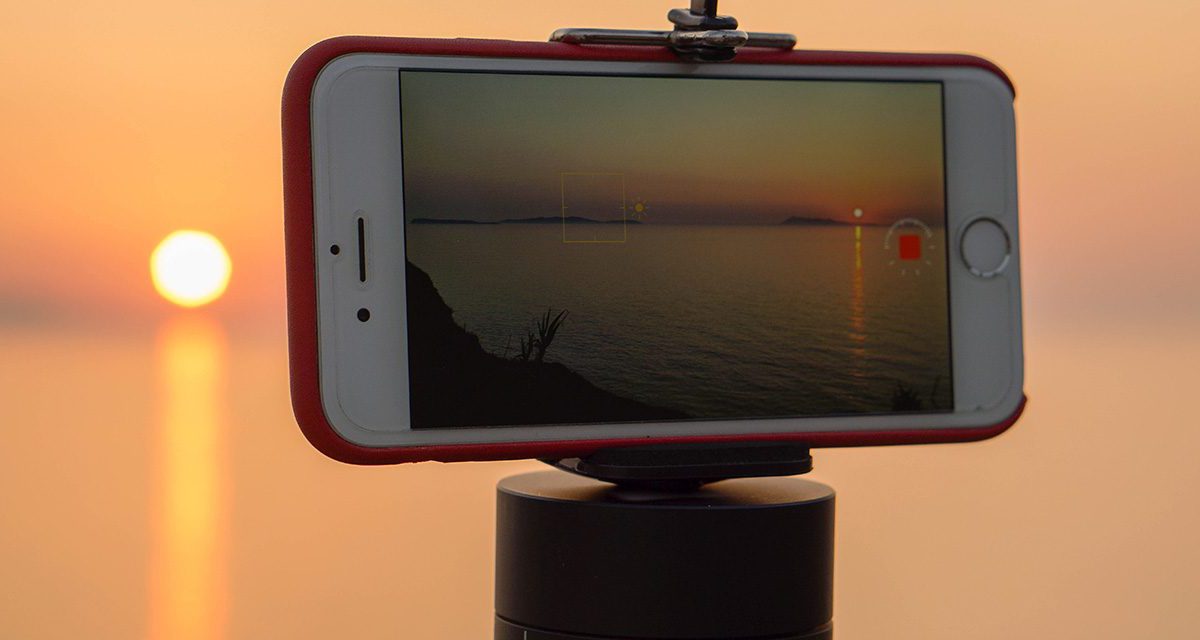
BRIGHT, indirect light is going to be your best friend. If you have a ring light, thats great and amazing but it’s totally not a necessity. There is a few prime times during the day that will automatically set you up for success. Golden hour is considered a magical time of day due to the amazing color and quality of the light… aim for this time! The golden hours occur approximately an hour after the sun rises and an hour before the sun sets.
Windows are ideal when finding the best lighting for videos indoors during the daytime. Choose a window that is generally in the shadows to give you soft, diffused light. Making sure the window stays in front of you while filming; this will give you balanced lighting. If you’re filming a video near a window flooded with bright and direct sunlight, the harsh lighting will create dark shadows on your face and cause you to squint.
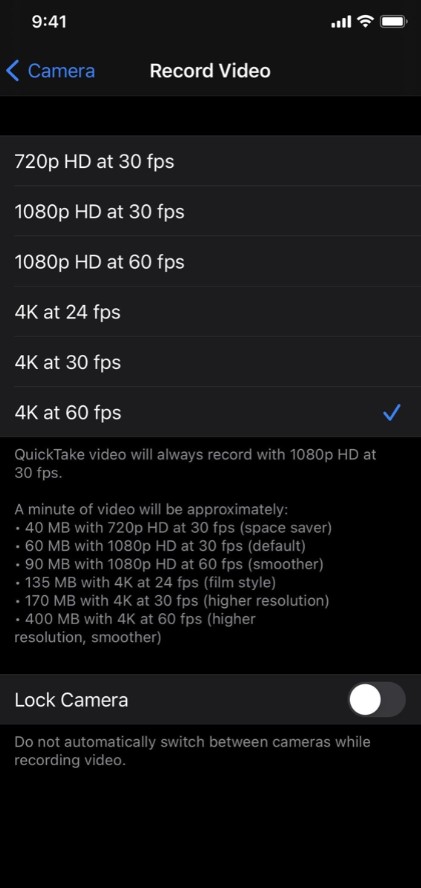
STEP THREE- SWITCH TO 4K and 60 FPS (frames per second)
4K is THE highest quality your iPhone will record at, making it a very important part of producing amazing videos. 24 fps will make your video look choppy and low quality. 30 fps will look like standard video- this is what your iPhone default setting is on. 60 fps will make captured motion look very smooth and high quality, which is what we want. This is a quick and easy change in your settings that will dramatically change how your videos look on all platforms.
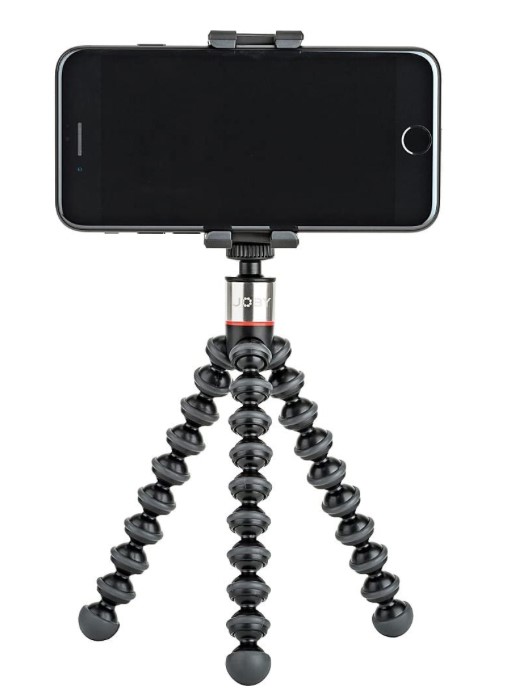
STEP FOUR- STABALIZE YOUR CAMERA
Have you ever seen the movie the Blair Witch Project? If you have, you know exactly what I’m taking about… If you haven’t, the entire movie is shot like somebody in the movie is recording it themselves- and it’s verrrrry distracting. Not to mention it can often times leave you with a headache. That is NOT what we’re going for here. Keeping your iPhone extremely still during filming is so important. A tripod like THIS one is perfect and affordable. I have one very similar and love it.
STEP FIVE- GET YOURSELF AN EXTERNAL MICROPHONE
Okay, I know you said that you only need ypur iPhone… but hear me out because this can be where things get tricky. Videos are only as good as the audio. I’ll say it again, VIDEOS ARE ONLY AS GOOD AS THE AUDIO. Trust me when I say I have learned this from experience… bad audio can and will ruin a great video. The onboard mics on the iPhone are decent for recording, yes. The problem is that you want your subject close to the microphone so that they can be heard crisp & clear. This isn’t always possible because you also want to be far enough away to have the framing and focus look perfect.
The best option is to get an external bluetooth microphone that plugs into the iPhone’s Lightning port. You can also get a microphone with a long cable that your subject can clip to a shirt but let’s be honest, cords are annoying. THIS is the mic that I use & LOVE.
WELL, there you have it. Happy filming & cheers to killer videos. Make sure to tag me on Instagram when you show off your new learned skills!!
